Brother sewing machines are renowned for reliability and user-friendliness, making them ideal for beginners. Numerous online tutorials, like those for the LX3817G and JV1400, simplify learning.
What is a Brother Sewing Machine?
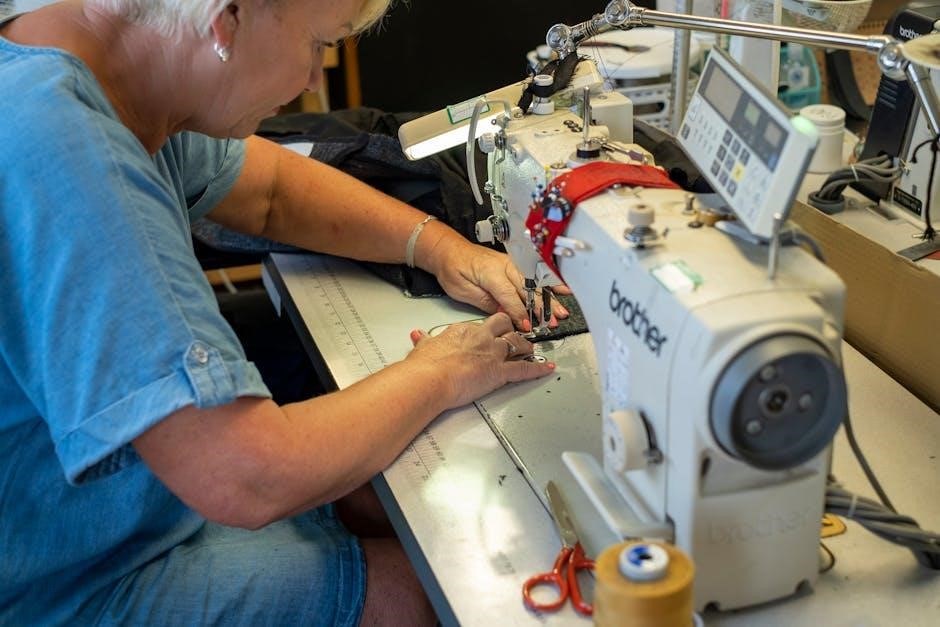
Brother is a globally recognized brand producing a diverse range of sewing machines, from basic mechanical models perfect for beginners to advanced computerized machines capable of intricate embroidery. These machines are celebrated for their durability, consistent performance, and innovative features. Many resources, including online tutorials, demonstrate how accessible Brother machines are, even for those entirely new to sewing.
Models like the LX3817G and JV1400 exemplify Brother’s commitment to providing user-friendly options. They often include built-in stitches, adjustable settings, and helpful guides. The availability of extensive online support, including step-by-step videos, ensures a smooth learning curve for anyone embarking on their sewing journey with a Brother machine.
Why Choose a Brother Sewing Machine for Beginners?
Brother sewing machines are exceptionally well-suited for beginners due to their ease of use and abundant learning resources. Numerous online tutorials, specifically for models like the LX3817G and JV1400, break down complex techniques into manageable steps. Their intuitive controls and clear instructions minimize frustration, fostering a positive initial sewing experience.
Furthermore, Brother machines often come with a variety of built-in stitches and adjustable settings, allowing beginners to experiment and develop their skills progressively. The brand’s reputation for reliability means less time troubleshooting and more time creating. Access to readily available support and a thriving online community further enhances the learning process, making Brother a smart choice.

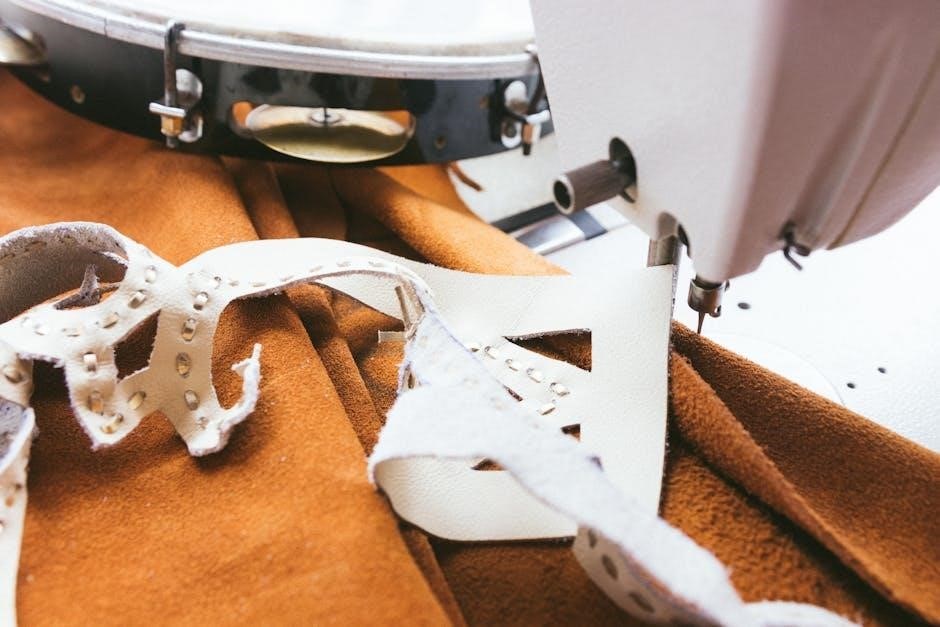
Understanding Your Brother Sewing Machine Parts
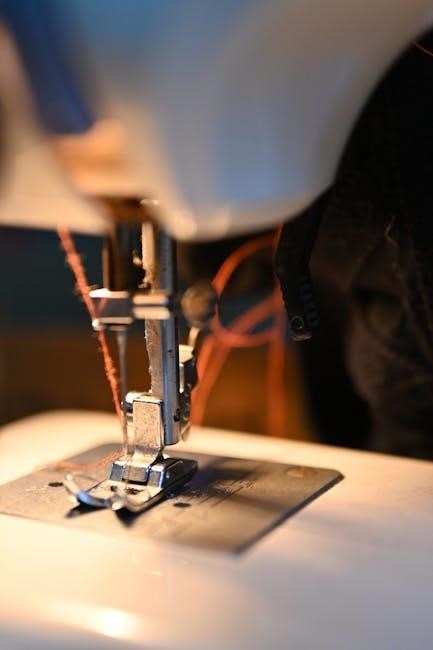
Brother machines feature key components like the needle, presser foot, and bobbin. Online tutorials demonstrate how these parts interact, crucial for successful sewing projects.
Main Components of a Typical Brother Model
Brother sewing machines, regardless of model – from beginner-friendly LX3817G to portable JV1400 – share core components. The power switch controls operation, while the handwheel allows manual stitching. The stitch selection dial offers various patterns, and the stitch length/width dials customize them.
Essential parts include the needle plate, guiding fabric, and the presser foot, holding it in place. The bobbin winder prepares the bobbin, and the bobbin case houses it. A thread tension dial regulates thread flow, impacting stitch quality. Many models, like the SE400/SE600 embroidery machines, have additional specialized components, but these basics are universal. Understanding these elements, often detailed in online tutorials, is key to mastering your machine.
Needle, Presser Foot, and Bobbin Explained
The needle pierces fabric, forming stitches; selecting the correct type is crucial for different materials. The presser foot secures fabric during sewing – various feet exist for specialized tasks, enhancing versatility. Online tutorials demonstrate changing these feet easily.
The bobbin, wound with lower thread, interlocks with the needle thread to create a stitch. Proper bobbin winding, as shown in many guides, is essential. Incorrect tension or improper insertion cause issues. Understanding how these three components interact is fundamental. Always switch the machine ‘off’ before needle area adjustments, ensuring safety, as highlighted in safety guidelines. Mastering these basics unlocks successful sewing.
Essential Accessories and Their Uses
Brother sewing machines benefit from various accessories. Needle sets cater to diverse fabrics, while extra bobbins prevent interruptions. Seam rippers correct mistakes efficiently – a beginner’s best friend! Presser feet, beyond the standard, enable techniques like zipper insertion and buttonholes.
Tutorials often showcase these tools. A lint brush keeps the machine clean, ensuring smooth operation. Machine oil maintains lubrication, preventing jams. Exploring embroidery features (like on SE400/SE600) requires specific hoops and stabilizers. Investing in quality accessories enhances your sewing experience and expands creative possibilities. Remember safety precautions when changing components.
Setting Up Your Brother Sewing Machine
Initial setup involves powering on and checking connections. Tutorials demonstrate bobbin winding and precise threading – crucial steps before starting any sewing project.
Powering On and Initial Checks
Before beginning, ensure your Brother sewing machine is connected to a stable power source. Switch the machine to the “off” position – indicated by the ‘O’ symbol – before making any adjustments, particularly around the needle area. This is a critical safety precaution emphasized in numerous tutorials.
Once connected, power on the machine. Verify the power light illuminates, confirming it’s receiving electricity. Inspect the cord and plug for any damage; never operate a machine with a compromised power supply. A quick visual check of all components, guided by online tutorials, ensures everything is in its correct position before threading and starting to sew. This proactive step minimizes potential issues later.
Winding the Bobbin – A Step-by-Step Guide
Begin by placing the thread spool on the spool pin. Guide the thread through the thread guides, following the path detailed in your machine’s manual or a helpful online tutorial. Next, thread the end of the thread through the tension disc, ensuring it’s securely seated.
Then, wrap the thread several times around the bobbin, initiating the winding process. Engage the bobbin winding mechanism – typically a lever or button – and gently press the foot pedal. Allow the machine to wind the bobbin evenly, stopping when full. Disengage the winding mechanism and remove the filled bobbin. Many tutorials demonstrate this clearly.
Threading the Machine – A Detailed Tutorial
Start by raising the presser foot; this releases tension on the thread. Follow your machine’s threading path, usually indicated by numbered diagrams. Guide the thread through the first thread guide, then around the tension discs – crucial for stitch quality. Continue threading through the take-up lever, ensuring it’s properly seated.
Next, thread the needle from front to back (or as your manual instructs). A helpful tutorial will visually demonstrate each step. Finally, draw a length of thread through the needle eye. Proper threading, as shown in online guides, is essential for smooth sewing and preventing issues.
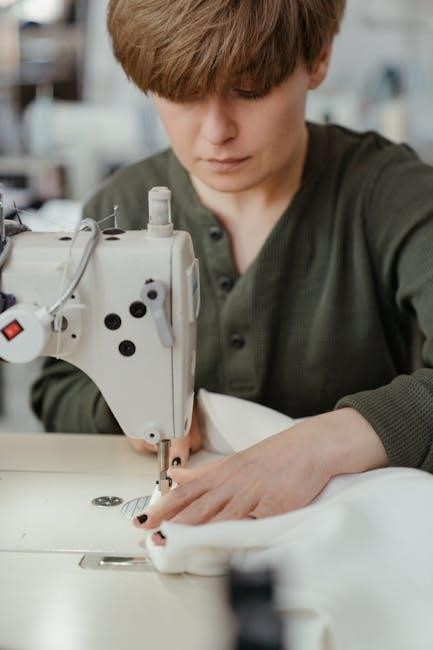
Basic Sewing Techniques
Mastering straight and zigzag stitches is fundamental. Online tutorials demonstrate adjusting stitch length and width for various fabrics, crucial for beginner success with Brother machines.
Straight Stitching – Mastering the Basics
Straight stitching forms the foundation of most sewing projects. Begin by threading your Brother machine correctly, following a detailed tutorial for your specific model – the LX3817G or JV1400 are popular starting points. Practice on scrap fabric first! Ensure consistent fabric feeding by gently guiding the material, not pulling or pushing it.
Adjust stitch length based on your fabric; shorter stitches for delicate materials, longer for heavier ones. Maintaining a consistent seam allowance is key for accurate results. Many online resources offer visual guides and troubleshooting tips for common issues like thread bunching or skipped stitches. Remember to always switch the machine off when making adjustments near the needle!
Zigzag Stitching – For Finishing and Stretch Fabrics
Zigzag stitching offers versatility beyond straight seams. It’s crucial for finishing raw edges to prevent fraying, and essential when working with knit or stretch fabrics. A tutorial focusing on your Brother machine (like the LX3817G or JV1400) will demonstrate adjusting stitch width and length. Wider zigzags provide more stretch coverage.
Practice on scraps to find the optimal settings for your fabric. Zigzag also serves as a decorative stitch! Remember safety – always turn off the machine before needle adjustments. Online guides often show how to troubleshoot uneven zigzag stitches or thread issues. Mastering zigzag expands your sewing capabilities significantly.
Adjusting Stitch Length and Width
Understanding stitch length and width is fundamental to sewing success with your Brother machine. A good tutorial will explain how these settings impact fabric appearance and durability. Shorter stitch lengths are ideal for delicate fabrics and curves, while longer lengths suit basting or gathering. Stitch width controls the zigzag’s breadth.
Experiment on scrap fabric! Brother machines often display recommended settings for various fabrics. Incorrect settings can cause puckering or weak seams. Refer to your machine’s manual or online resources for specific guidance. Remember to always test before sewing your final project. Mastering these adjustments unlocks creative control.
Advanced Techniques & Features
Brother sewing machines offer diverse presser feet and built-in stitches; Tutorials demonstrate embroidery basics (SE400/SE600) and unlock your machine’s full potential.
Using Different Presser Feet
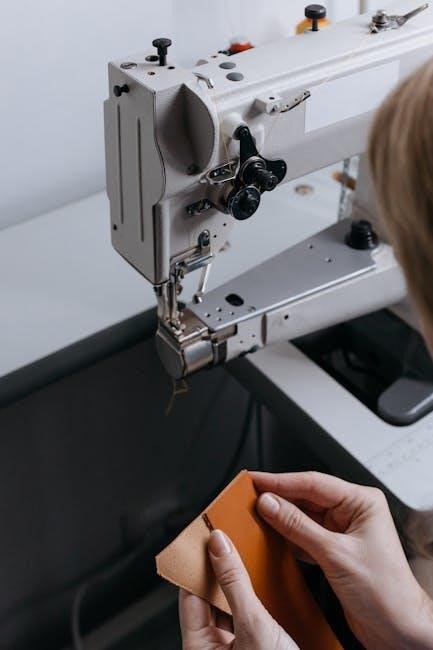
Brother sewing machines truly expand their capabilities with a variety of presser feet, each designed for specific tasks. Online tutorials demonstrate how to switch feet easily and maximize their function. A zigzag foot is essential for stretch fabrics and decorative stitching, while a buttonhole foot automates buttonhole creation.
Quilting feet provide even fabric feed, crucial for precise patchwork. A walking foot assists with multiple layers, preventing shifting. Mastering these feet, through dedicated tutorials, unlocks advanced sewing projects. Understanding which foot to use for each application dramatically improves stitch quality and project outcomes, transforming your sewing experience.
Understanding and Utilizing Built-in Stitches
Brother sewing machines boast a range of built-in stitches beyond the basic straight and zigzag. Many online tutorials guide users through accessing and experimenting with these options. Decorative stitches add embellishment, while blind hem stitches create professional-looking finishes. Stretch stitches are ideal for knit fabrics, preventing puckering.
Understanding stitch functions, often detailed in the machine’s manual and supplemental tutorials, is key. Experimenting with stitch length and width further customizes results. Utilizing these built-in stitches expands creative possibilities, allowing for diverse projects and personalized designs. Don’t hesitate to explore – practice makes perfect!
Embroidery Machine Basics (Brother SE400/SE600)
Brother SE400/SE600 embroidery machines open a world of creative possibilities. Numerous online tutorials demonstrate the basics, from transferring designs via USB to hooping fabric correctly; Stabilizers are crucial for preventing puckering and ensuring clean embroidery. Understanding the machine’s software for editing and customizing designs is also key.
Step-by-step tutorials guide users through threading, bobbin loading specific to embroidery, and test stitching. Learning to adjust tension and needle settings optimizes stitch quality. These machines combine sewing and embroidery functions, offering versatility. Mastering these basics unlocks the potential for personalized gifts and unique creations.
Maintenance and Troubleshooting
Regular cleaning and oiling, as shown in many tutorials, keep your Brother machine running smoothly. Addressing common issues like thread jams is easily learned online.
Cleaning Your Brother Sewing Machine
Consistent cleaning is vital for optimal performance and longevity of your Brother sewing machine. Begin by powering off and disconnecting the machine from the power source for safety. Utilize a soft brush to remove lint and dust from the bobbin area, feed dogs, and around the needle plate. Many online tutorials demonstrate this effectively;
A small vacuum cleaner with a brush attachment can also be helpful for removing stubborn debris. Gently wipe down the exterior surfaces with a slightly damp cloth. Avoid using harsh chemicals or abrasive cleaners, as these can damage the machine’s finish. Regularly cleaning prevents thread buildup and ensures smooth operation, extending the life of your valuable sewing companion. Remember to consult your machine’s manual for specific cleaning recommendations.
Oil and Lubrication – Keeping it Running Smoothly
Proper lubrication ensures your Brother sewing machine operates quietly and efficiently. Refer to your machine’s manual for specific oiling points – typically, these include the bobbin race, hook assembly, and motor shaft. Use only sewing machine oil; other lubricants can cause damage. Apply oil sparingly, a drop at a time, to avoid over-lubrication.
Many helpful tutorials online visually demonstrate the oiling process for various Brother models. After oiling, run the machine briefly to distribute the oil evenly. Regular oiling, alongside cleaning, prevents friction and wear, extending the machine’s lifespan. Avoid oiling the feed dogs or needle plate, as this can attract lint and cause issues.
Common Problems and Solutions
Thread bunching often indicates incorrect threading or improper bobbin winding – re-thread the machine and rewind the bobbin, consulting a tutorial if needed. Skipped stitches can stem from a dull or incorrect needle; replace it with the correct type for your fabric. If the machine jams, ensure the presser foot is lowered and the feed dogs are engaged.
Online resources offer troubleshooting guides specific to Brother models like the LX3817G and JV1400. Always switch the machine off before attempting any repairs. If problems persist, consult a qualified sewing machine technician. Regular maintenance, as shown in many online tutorials, can prevent many issues.
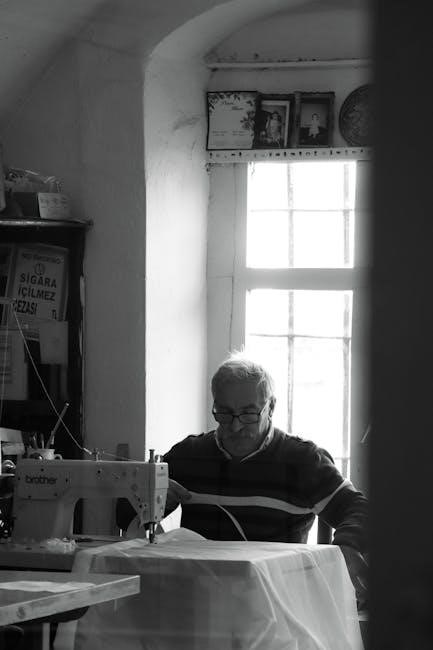
Safety Precautions
Always disconnect the power before needle adjustments or threading, as detailed in any tutorial. Never operate a damaged machine, and heed all safety guidelines.
Operating with a Damaged Machine
Never attempt to use a Brother sewing machine exhibiting any damage. This includes a frayed or damaged power cord, a malfunctioning switch, or physical damage resulting from drops or impacts. Operating a compromised machine presents significant safety risks, potentially leading to electric shock or injury. Tutorials often emphasize pre-operation checks, but these are insufficient for a genuinely damaged unit.
If the machine has been dropped or exposed to water, immediately discontinue use and seek professional repair. Do not attempt self-repair, as this could exacerbate the problem and void any warranty. Prioritize safety; a damaged machine is not worth the risk. Always consult a qualified technician for assessment and repair before resuming operation. Following this advice ensures a safe sewing experience.
Needle Area Adjustments
Before making any adjustments near the needle – such as threading, changing the needle, or adjusting the presser foot – always switch the sewing machine to the “off” position (symbol “O”). This crucial safety step prevents accidental activation during delicate operations. Many tutorials demonstrate these procedures, consistently highlighting this initial precaution.
Incorrect needle adjustments can lead to broken needles, fabric jams, and potential injury. Ensure the machine is completely stopped before reaching into the needle area. Refer to your Brother sewing machine’s manual for specific instructions related to your model. Proper needle installation and threading are fundamental skills covered in most beginner guides and online resources.
General Safety Guidelines
When operating your Brother sewing machine, prioritize safety. Never use a machine with a damaged cord or plug, or if it malfunctions in any way. If dropped or exposed to water, do not attempt to operate it. Always read all instructions thoroughly before use – many beginner tutorials emphasize this point.
Basic safety precautions are paramount. Keep fingers away from moving parts, and always disconnect the power when cleaning or changing the needle. Supervise children closely when the machine is in use. A well-maintained machine, used responsibly, provides years of creative enjoyment. Refer to your manual for comprehensive safety information.
Brother LX3817G Specifics
Brother LX3817G is a popular beginner machine; online tutorials demonstrate its ease of use, covering basic sewing techniques and features for new users.
Beginner’s Guide to the LX3817G
The Brother LX3817G is a fantastic entry point into the world of sewing, celebrated for its simplicity and reliability. Numerous online resources cater specifically to this model, offering comprehensive tutorials for beginners. These guides typically begin with unboxing and initial setup, demonstrating how to properly wind the bobbin and thread the machine – crucial first steps.
You’ll find videos detailing basic stitch selection, including straight and zigzag stitches, and how to adjust stitch length and width. Many tutorials also cover essential techniques like seam allowances and finishing edges. Don’t hesitate to explore these resources; they’ll quickly build your confidence and skills, allowing you to tackle simple sewing projects with ease. Mastering the LX3817G is a rewarding experience!
Unique Features of the LX3817G Model
The Brother LX3817G distinguishes itself with a blend of practicality and ease of use. While a beginner machine, it boasts 17 built-in stitches, offering versatility beyond basic straight sewing. Many online tutorials highlight its automatic needle threader, a significant time-saver and frustration-reducer for newcomers.
The LX3817G also features a free arm, ideal for sewing cuffs, sleeves, and other cylindrical shapes. Tutorials often demonstrate how to utilize this feature effectively. Its lightweight design contributes to portability, making it suitable for classes or small spaces. Exploring these unique aspects through dedicated guides will unlock the full potential of this capable machine.
Brother JV1400 Specifics
The Brother JV1400 is a compact, portable machine perfect for beginners. Online tutorials and unboxing videos demonstrate its simple setup and convenient operation.
Unboxing and First Use of the JV1400
Upon unboxing your Brother JV1400, carefully inspect all included accessories – power cord, foot pedal, needles, bobbins, and potentially a sample fabric piece. Many beginner tutorials available online demonstrate the initial setup process. First, attach the power cord and foot pedal. Then, familiarize yourself with the machine’s basic components.
A crucial first step is winding the bobbin, which several video tutorials clearly illustrate. Following this, learn to thread the machine correctly, as proper threading is essential for smooth operation. Before sewing, practice on scrap fabric to adjust stitch length and tension. The JV1400’s portability makes it ideal for classes or small spaces, and online resources will guide you through its features.
Portability and Convenience of the JV1400
The Brother JV1400 excels in portability, making it a fantastic choice for beginners and those with limited space. Its lightweight design and compact size allow for easy transport to sewing classes, workshops, or simply moving between rooms. Numerous online tutorials highlight its user-friendly features, simplifying setup and operation anywhere.
This convenience doesn’t compromise functionality; the JV1400 offers essential stitches for various projects. Many beginner guides demonstrate how to quickly set up and start sewing, even on the go. Its straightforward design and readily available online resources ensure a smooth learning curve, maximizing convenience and enjoyment.