Frigidaire Electric Dryer Manual: A Comprehensive Guide
This detailed manual, spanning 80 pages (as of 02/18/2026, 07:33:12), offers extensive service information for Frigidaire dryers, sourced from manualzilla and related collections.
Understanding Your Frigidaire Dryer Model
Your Frigidaire electric dryer is a sophisticated appliance designed for efficient and reliable clothes drying. Familiarizing yourself with its specific features and capabilities is crucial for optimal performance and longevity. This section aims to provide a foundational understanding of how your dryer operates, moving beyond simply pressing start.
Different Frigidaire models offer varying functionalities, from basic timed drying to advanced moisture-sensing technology. The service manual (dated 02/18/2026, sourced from manualzilla) details these variations extensively. Understanding these differences allows you to select the most appropriate cycle for your laundry load, maximizing energy efficiency and protecting your garments. Knowing your model’s capabilities also aids in troubleshooting potential issues, as certain problems are specific to particular dryer configurations. This manual, a comprehensive 80-page resource, is your key to unlocking your dryer’s full potential.
Locating Your Dryer’s Model Number
Identifying your Frigidaire electric dryer’s model number is paramount for accessing accurate service information and replacement parts. This number is a unique identifier that specifies your dryer’s exact configuration and features. The 80-page Frigidaire Dryer Service Manual (dated 02/18/2026, sourced from manualzilla) emphasizes the importance of this number for effective troubleshooting and repair.
Typically, the model number is found on a label located inside the dryer door frame, or on the back panel. It’s a combination of letters and numbers. Having this number readily available when contacting customer support or ordering parts ensures you receive the correct assistance and components. Referencing the manual, alongside your model number, will streamline any maintenance or repair processes, guaranteeing compatibility and optimal performance of your appliance. Accurate identification prevents delays and ensures a successful outcome.
Safety Precautions & Warnings
Prior to any operation, maintenance, or repair of your Frigidaire electric dryer, as detailed within the comprehensive 80-page service manual (dated 02/18/2026, sourced from manualzilla), strict adherence to safety precautions is crucial. Always disconnect the dryer from the power supply – unplug it from the electrical outlet – to prevent electrical shock.
Never attempt repairs while the dryer is connected. Be mindful of hot surfaces during and after operation; allow the dryer to cool completely before handling any internal components. Avoid using flammable materials near the dryer. Regularly inspect and clean the vent system to prevent fire hazards, a point heavily emphasized in the manual. Improper installation or modification can create unsafe conditions. If you are uncomfortable performing any repair, consult a qualified technician. Your safety is paramount.

Dryer Operation & Features
The Frigidaire dryer manual (manualzilla source, 02/18/2026) details cycle selections, control functionalities, and the innovative moisture sensor technology for optimal drying performance.
Starting a Drying Cycle
Before initiating a drying cycle with your Frigidaire electric dryer, as detailed in the comprehensive service manual (sourced from manualzilla, dated 02/18/2026), ensure the lint filter is clean and the dryer drum is empty of any foreign objects. Proper preparation is crucial for safe and efficient operation.
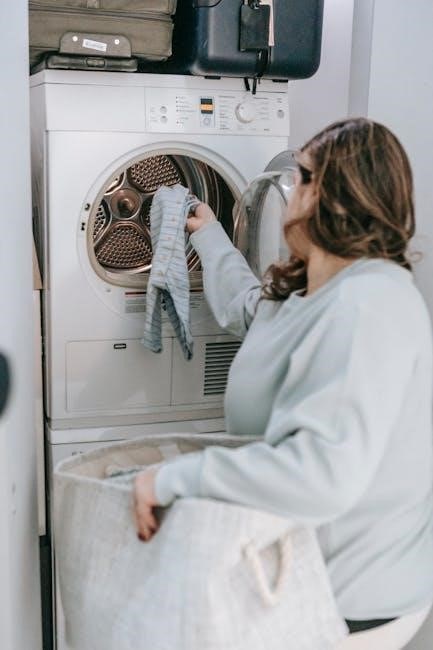
To begin, load your laundry, ensuring not to overload the dryer – this can hinder proper tumbling and drying. Close the dryer door securely. Next, turn the cycle selector dial to your desired drying cycle (refer to the Cycle Selection Guide for appropriate settings). Adjust any additional options, such as temperature settings or dryness levels, using the corresponding controls.
Finally, press the ‘Start’ button to commence the drying cycle. The dryer will automatically begin heating and tumbling. The manual emphasizes monitoring the cycle initially to confirm proper operation. The dryer’s indicators will illuminate, providing feedback on the cycle’s progress. Remember to consult the full manual for specific model instructions and safety guidelines.
Cycle Selection Guide (Normal, Delicate, Timed Dry, etc.)
The Frigidaire electric dryer, as outlined in the service manual (manualzilla source, dated 02/18/2026), offers a variety of cycles to accommodate different fabric types and drying needs. The ‘Normal’ cycle is ideal for everyday cottons and linens, utilizing medium-high heat. For delicate items like lingerie or silk, select the ‘Delicate’ cycle, which employs low heat and gentle tumbling.
The ‘Timed Dry’ cycle allows for customized drying times, useful for small loads or items requiring specific drying durations. ‘Permanent Press’ is designed for wrinkle-resistant fabrics, using medium heat. Additional cycles may include ‘Bulky/Sheets’ for larger items and ‘Sanitize’ for enhanced disinfection.
Always refer to garment care labels before selecting a cycle. The manual stresses that improper cycle selection can lead to fabric damage. Understanding each cycle’s heat level and tumbling action is key to achieving optimal drying results and prolonging the life of your clothes.
Understanding Dryer Controls & Indicators
The Frigidaire electric dryer’s control panel, detailed in the service manual (sourced from manualzilla, dated 02/18/2026), features a cycle selector dial to choose the desired drying program. Push-to-start buttons initiate the cycle, and indicator lights illuminate to show the selected settings and dryer status. A digital display, if equipped, provides remaining time estimates.
Key indicators include ‘Power,’ ‘Start/Pause,’ ‘End of Cycle,’ and potentially ‘Moisture Sensor’ or ‘Lint Filter’ reminders. Understanding these lights is crucial for monitoring the drying process. The manual emphasizes that certain indicators may flash to signal an error condition, requiring troubleshooting.
Controls may also include options for adjusting heat levels, selecting specific features like ‘Wrinkle Shield,’ and setting a delayed start time. Familiarizing yourself with each control and indicator ensures efficient and safe dryer operation, as outlined in the comprehensive 80-page guide.
Moisture Sensor Functionality Explained
Frigidaire electric dryers utilize moisture sensors to automatically detect when clothes are dry, preventing over-drying and saving energy. As detailed in the service manual (dated 02/18/2026, sourced from manualzilla), these sensors, typically metal strips inside the drum, measure the conductivity of the clothes. Wet fabrics conduct electricity, while dry fabrics do not.
The dryer’s control board interprets these readings and terminates the cycle when sufficient dryness is achieved. The manual stresses that lint buildup on the sensors can impair their accuracy, leading to longer drying times or clothes remaining damp. Regular cleaning of the sensors is therefore vital.
Some models offer adjustable moisture level settings, allowing users to customize the dryness preference. Understanding the sensor’s operation, as outlined in the 80-page guide, ensures optimal performance and extends the life of your garments.
Troubleshooting Common Issues
The Frigidaire dryer service manual (manualzilla, 02/18/2026) details solutions for problems like the dryer not starting, heating, or tumbling, aiding quick repairs.

Dryer Not Starting – Possible Causes & Solutions
If your Frigidaire electric dryer fails to start, several issues could be at play, as detailed within the comprehensive service manual (sourced from manualzilla, dated 02/18/2026). First, verify the power supply – ensure the dryer is properly plugged into a functioning outlet and that the circuit breaker hasn’t tripped.
Next, check the door switch; the dryer won’t operate if the door isn’t securely closed and the switch engaged. A faulty thermal fuse is another common culprit, interrupting power to the heating element and preventing startup. The timer or electronic control board could also be defective, requiring inspection and potential replacement.
Finally, a worn-out drive belt, while typically affecting tumbling, can sometimes prevent the motor from engaging altogether. The service manual provides detailed diagnostic steps and component locations to facilitate accurate troubleshooting and repair, ensuring a safe and efficient restoration of your dryer’s functionality.
Dryer Not Heating – Diagnosis & Repair
A Frigidaire electric dryer failing to heat requires systematic diagnosis, as outlined in the service manual (manualzilla source, dated 02/18/2026). The most frequent cause is a blown thermal fuse, a safety device designed to protect against overheating. This fuse must be replaced, not simply reset, as a recurring blow indicates a deeper issue.
Next, inspect the heating element itself for breaks or damage; continuity testing with a multimeter is crucial. A faulty gas valve (for gas dryers, though this manual focuses on electric) or a malfunctioning electronic control board can also prevent heating. The manual details how to access and test these components.
Remember to always disconnect power before any repair attempt. The service manual provides detailed diagrams and troubleshooting flowcharts to guide you through the process, ensuring accurate diagnosis and a safe, effective repair of your dryer’s heating system.
Dryer Drum Not Tumbling – What to Check
If your Frigidaire dryer drum isn’t tumbling, consult the service manual (sourced from manualzilla, updated 02/18/2026) for a comprehensive troubleshooting guide. The primary suspect is often the drive belt, which can snap or slip off the pulleys. Accessing and inspecting the belt requires removing the dryer’s front or rear panel, as detailed in the manual’s diagrams.
Beyond the belt, check the motor itself for functionality. A seized motor or a faulty motor capacitor can prevent drum rotation. The manual provides instructions for testing the motor’s windings and capacitor with a multimeter. Also, examine the idler pulley; a worn or seized pulley can impede belt movement.
Ensure no obstructions, like clothing items, are caught between the drum and the front baffle. Always disconnect power before any inspection or repair, prioritizing safety as outlined in the manual.
Clothes Taking Too Long to Dry – Efficiency Tips

Extended drying times with your Frigidaire dryer (referencing the manual from manualzilla, last updated 02/18/2026) often stem from restricted airflow. The most common culprit is a clogged lint filter – clean it before every load! A full filter dramatically reduces efficiency. Beyond the filter, a blocked dryer vent is a serious concern, potentially creating a fire hazard, and significantly lengthening drying cycles.
Ensure the vent is clear from lint buildup, using a vent cleaning kit. Overloading the dryer also hinders airflow; smaller loads dry faster. Verify the correct cycle is selected for the fabric type. Finally, check the exterior vent cap to ensure it isn’t blocked by snow, debris, or a bird’s nest.

Maintenance & Cleaning
Regular upkeep, detailed in the Frigidaire dryer service manual (manualzilla, updated 02/18/2026), ensures optimal performance and longevity, preventing potential hazards.
Cleaning the Lint Filter – Importance & Procedure
Maintaining a clean lint filter is paramount for safe and efficient dryer operation, as highlighted in the Frigidaire dryer service manual (manualzilla, dated 02/18/2026). A clogged filter restricts airflow, leading to longer drying times, increased energy consumption, and a potential fire hazard.
Importance: Accumulated lint is highly flammable. Restricted airflow forces the dryer to work harder, potentially overheating components and shortening the appliance’s lifespan. Regularly cleaning the lint filter minimizes these risks.
Procedure: After each drying cycle, remove the lint filter – typically located inside the dryer door or on top of the dryer cabinet. Gently pull the filter straight up and out. Use your fingers or a soft brush to remove the lint. Ensure the filter is completely free of debris.
Reinstall the lint filter securely before operating the dryer. Periodically, wash the lint filter with mild soap and water to remove any buildup from fabric softeners or dryer sheets, allowing it to dry completely before replacing it. Refer to the manual for specific filter type instructions.
Cleaning the Dryer Vent – Preventing Fires & Improving Efficiency
The Frigidaire dryer service manual (sourced from manualzilla, updated 02/18/2026) emphasizes the critical importance of regular dryer vent cleaning. Lint accumulation within the vent system poses a significant fire hazard and drastically reduces dryer efficiency. A blocked vent forces the dryer to work harder, increasing energy costs and potentially damaging the appliance.
Preventing Fires: Lint is highly combustible. A clogged vent allows lint to build up, creating a dangerous fire risk. Annual professional vent cleaning is highly recommended.
Improving Efficiency: A clear vent allows for proper airflow, reducing drying times and energy consumption. Inspect the vent connection behind the dryer regularly for kinks or obstructions. Disconnect the vent from the dryer and the wall, then use a vent cleaning brush or vacuum to remove lint. Ensure all connections are secure after cleaning. Ignoring this maintenance can void your warranty.
Exterior & Interior Cleaning Instructions
Maintaining a clean Frigidaire dryer, as detailed in the service manual (manualzilla, last updated 02/18/2026), extends its lifespan and ensures optimal performance. For the exterior, use a damp cloth with mild detergent to wipe down the cabinet. Avoid abrasive cleaners, which can damage the finish. Never spray or pour water directly onto the dryer.
Interior Cleaning: After each load, wipe down the drum with a damp cloth to remove any residue. For stubborn stains, a mild soap solution can be used, but ensure it’s thoroughly rinsed away. Regularly check and clean around the door seal to prevent lint buildup.
Caution: Always disconnect the dryer from the power supply before any interior cleaning. Avoid using harsh chemicals or solvents. A clean dryer operates more efficiently and reduces potential odors.
Advanced Troubleshooting & Repair
This section, found within the 80-page Frigidaire dryer service manual (manualzilla, updated 02/18/2026), details complex repairs like element replacement and error code analysis.
Replacing the Heating Element
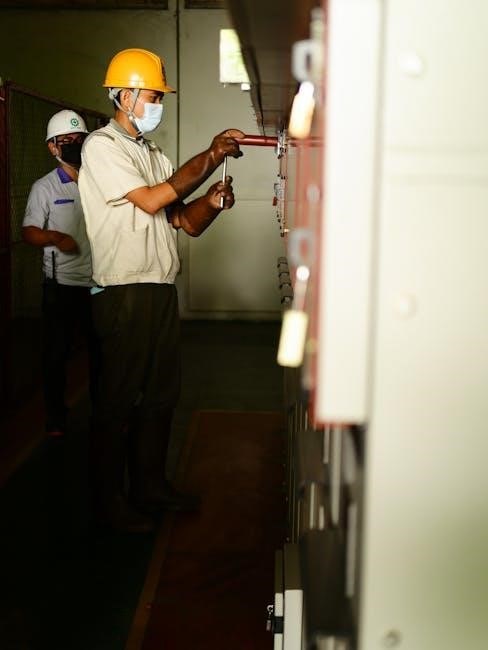
Replacing the heating element in your Frigidaire electric dryer, as detailed in the comprehensive 80-page service manual (sourced from manualzilla, last updated 02/18/2026), requires careful attention to safety and procedure. Always disconnect the dryer from the power supply before beginning any repairs. Accessing the heating element typically involves removing the rear access panel.
Once accessed, carefully disconnect the wires connected to the element, noting their positions for correct reassembly. The element is usually secured with screws or clips; remove these to free the element. Before installing the new heating element, test it for continuity using a multimeter to ensure it’s functioning correctly.
Reinstall the new element, reconnect the wires precisely as they were before, and secure it with the screws or clips. Finally, reattach the rear access panel and restore power to the dryer. Refer to the manual for specific diagrams and component locations relevant to your dryer model.
Checking & Replacing the Thermal Fuse
The thermal fuse, a critical safety component detailed within the 80-page Frigidaire dryer service manual (manualzilla source, updated 02/18/2026), protects the dryer from overheating. A blown fuse typically indicates a restricted airflow, so address that issue first. Always disconnect power before proceeding. Locate the thermal fuse – often near the exhaust vent or heating element – and access it by removing appropriate panels.

Use a multimeter to test for continuity across the fuse terminals. If no continuity exists, the fuse is blown and must be replaced. Note the fuse’s amperage and voltage rating before purchasing a replacement. Remove the old fuse and install the new one, ensuring a secure connection.
Reassemble the dryer and restore power. If the new fuse blows immediately, a more significant issue, like a blocked vent, is present and requires further investigation as outlined in the manual.
Diagnosing & Replacing the Drive Belt
A broken or worn drive belt, covered extensively in the Frigidaire dryer service manual (manualzilla, dated 02/18/2026), prevents the drum from tumbling. Diagnosis involves visually inspecting the belt – accessible after removing the front or rear panel – for cracks, fraying, or breakage. Disconnect power before any inspection. If the belt is intact but loose, check the tensioner pulley.
To replace the belt, carefully route the new belt around the drum, motor pulley, and tensioner pulley, following the diagram in the manual. Ensure the belt is properly seated in the grooves. Re-engage the tensioner, and verify smooth drum rotation.
If the belt continues to slip or break prematurely, inspect the pulleys for wear or damage. Refer to the manual’s troubleshooting section for further guidance on related issues and component replacement.
Understanding Error Codes & Their Meanings
Frigidaire electric dryers utilize error codes to signal malfunctions, detailed within the comprehensive service manual (manualzilla, as of 02/18/2026). These codes, displayed on the control panel, pinpoint specific issues, streamlining troubleshooting. Common codes indicate problems with the heating element, thermal fuse, moisture sensor, or motor.
For example, a code relating to the thermal fuse suggests overheating protection has activated. The manual provides a complete list of error codes, their probable causes, and recommended solutions. Always disconnect power before attempting any repairs based on error code diagnostics.
Referencing the manual’s error code section is crucial for accurate diagnosis and effective repair, preventing unnecessary component replacement and ensuring dryer safety and optimal performance.